Admin → Receipts sets the receipt logo, messages and lines with a live preview; Storefront and Storefront pages set up your public website.
A step-by-step walkthrough with real screenshots · FoolProof POS for alcohol retail
Steps
Open Admin → Receipts.
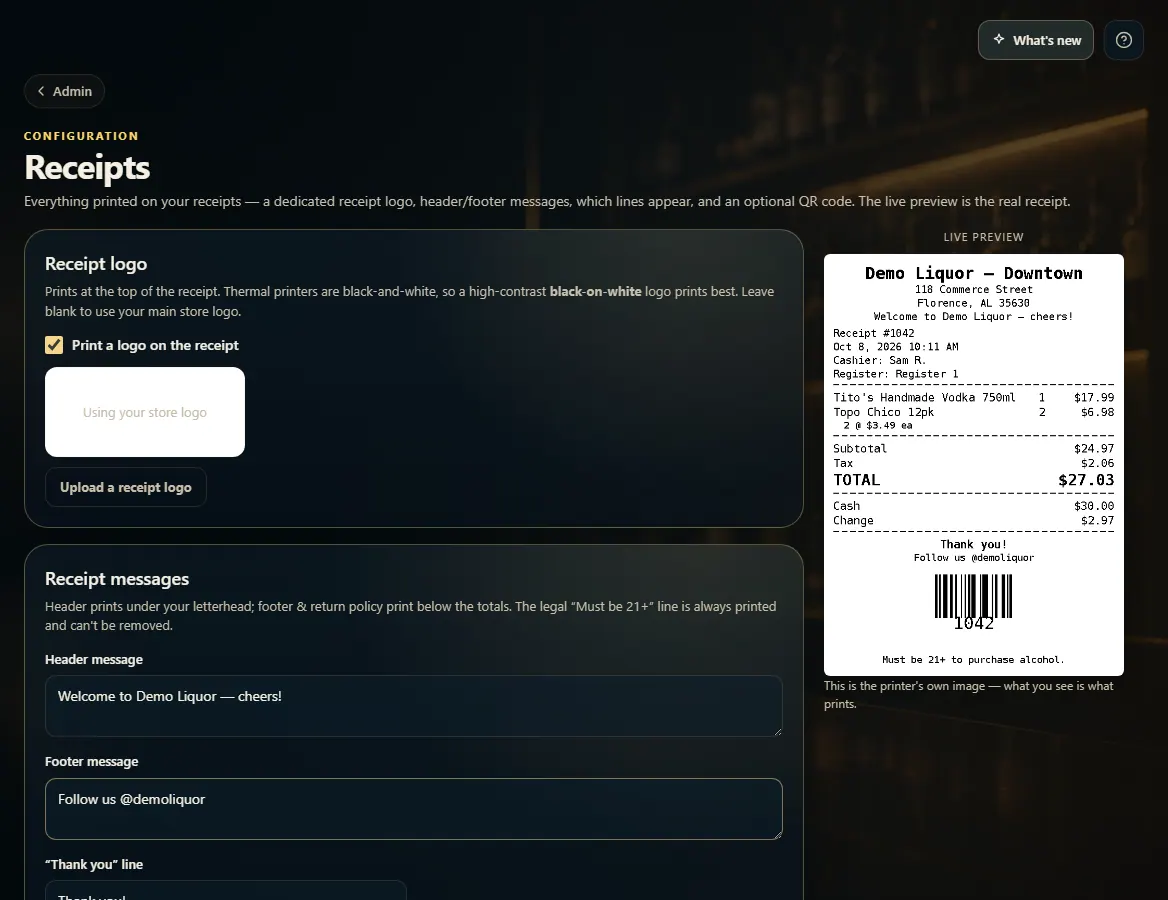
Choose a receipt logo, type a Header message and Footer message, and turn lines on or off under What appears on the receipt. The Live preview shows exactly what prints.
Under Printing after a sale, choose whether a receipt prints automatically, asks, or doesn't print.
Click Save receipt settings.
For your website, open Admin → Storefront: the Design tab sets logo, hero, theme and featured products; the Settings tab sets your web address, delivery/pickup and whether the storefront is live.
To edit About, Terms, Privacy and other pages, open Admin → Storefront pages, pick a page, edit it and click Save page.
Good to know
Your business name, address, phone and license on the receipt come from Admin → Business details.
The legal "Must be 21+" line always prints and can't be removed.
The register close-out slip (what prints when a drawer closes) is set on the same Receipts page.
Admin → Retail media turns sponsored placements on your storefront on or off. It also lists products shoppers searched for that you don't carry.
Delivery radius, fees and hours are under Admin → Delivery.
1. Your receipt, with a live preview
Type a header or footer message and the preview on the right updates — it's the printer's own image. Save receipt settings when it looks right.
123
1Prints under your letterhead.
2Prints below the totals.
3Exactly what the printer prints.
2. Storefront pages
Pick a page on the left, edit its text and images, and click Save page. + Add page makes a new one.
 123
123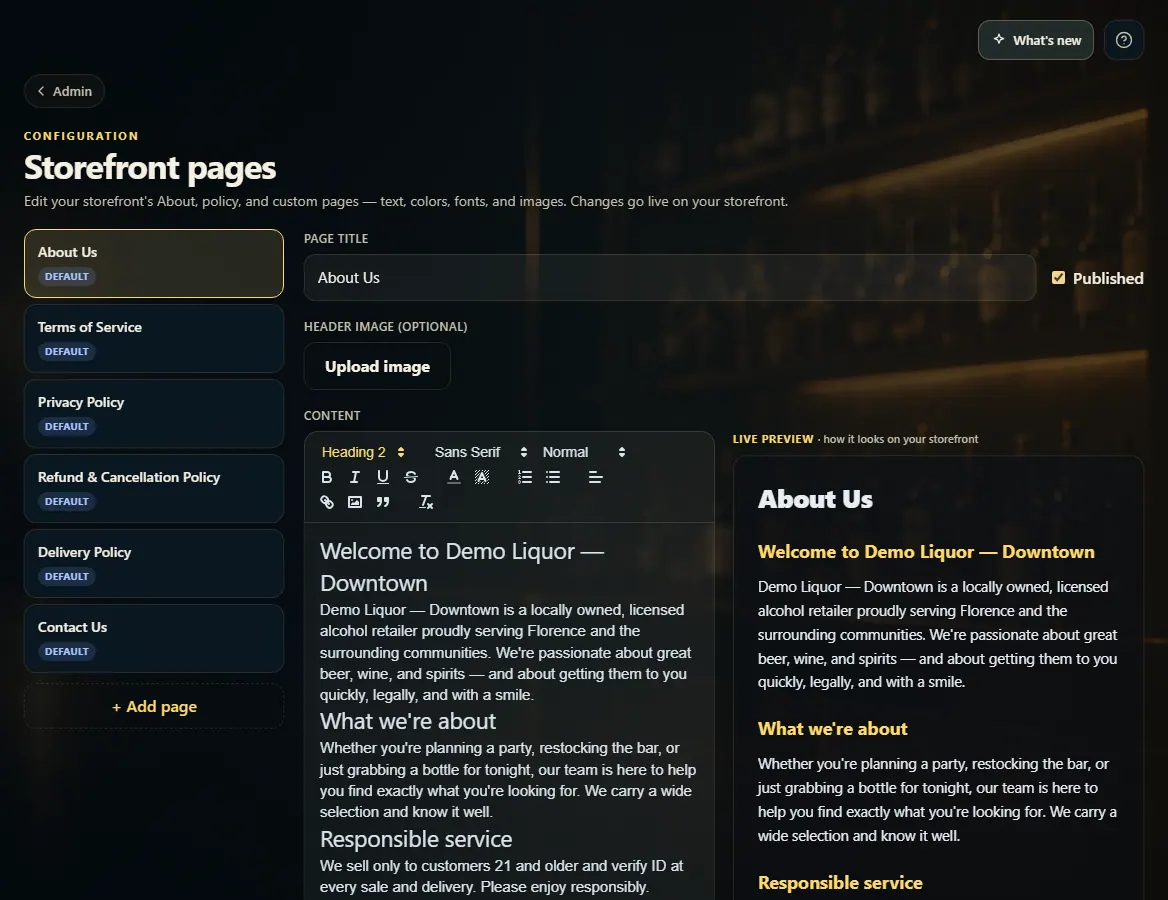 123
123