Admin → Hardware is where you add and test your receipt and label printers, set up each register, and choose when the cash drawer opens.
A step-by-step walkthrough with real screenshots · FoolProof POS for alcohol retail
Steps
Open Admin → Hardware.
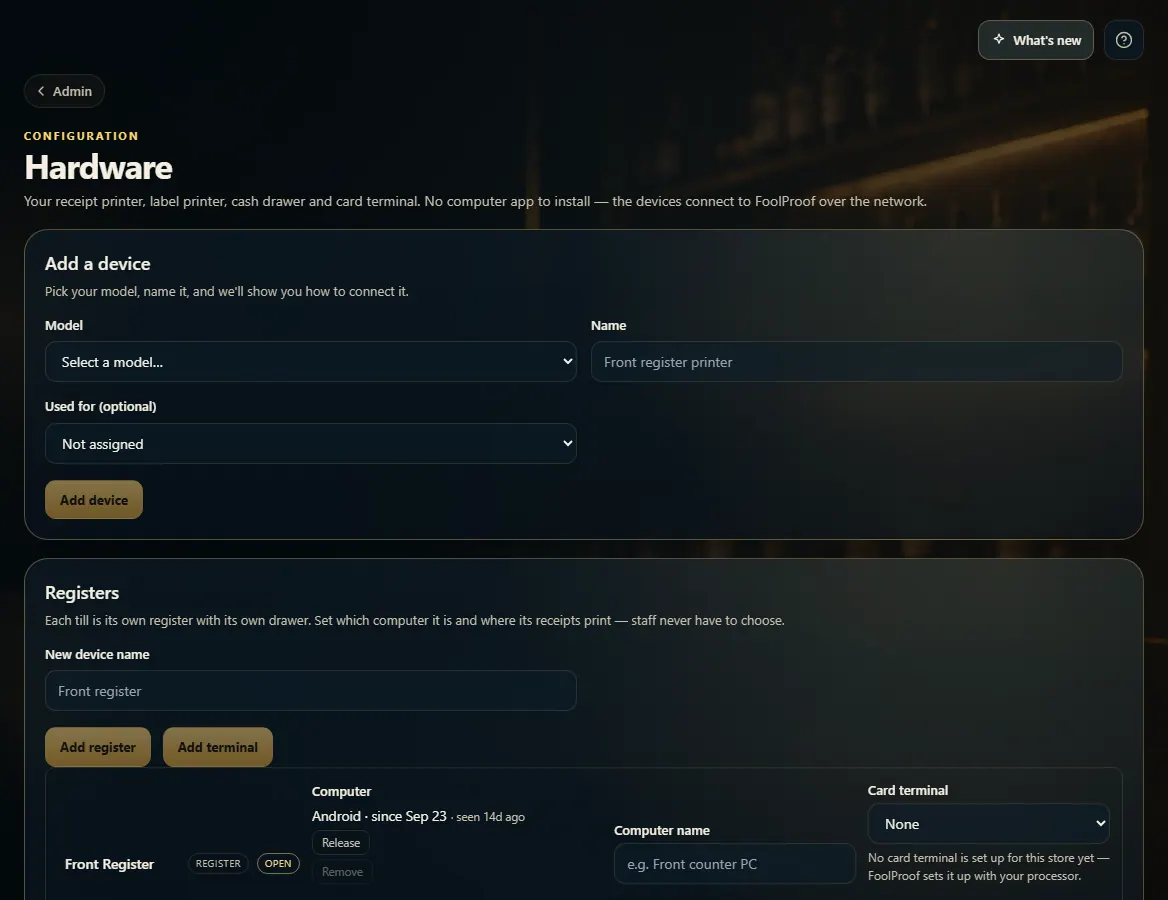
Under Add a device, pick the Model, type a Name, choose what it's Used for, and click Add device. The setup page shows how to connect it.
Click Print test (or Open drawer) on a printer to check it works. The ⋯ menu has Set up / connection details.
Under Registers, type a name and click Add register (with a cash drawer) or Add terminal (card only). Then choose which printer handles each register's Receipts and Labels.
Under Cash drawer, choose Open on cash sales and Open on card sales, and set the Target cash to leave at close.
Good to know
No app to install — printers connect to FoolProof over your network. Printers still waiting to connect show Finish setting this up.
The cash drawer is wired to the receipt printer, so it opens on whichever printer that register uses. If it doesn't open, try Try channel 2.
Close a register before changing its computer or printers. Renaming is fine mid-shift.
A new register is claimed by the next computer that opens the Register screen. Release frees it for another computer.
Card terminals are set up by FoolProof with your payment processor; once one is ready, pick it for each register under Card terminal.
Barcode scanners need no setup: plug one in and it types the code into whatever box is selected.
Shelf-tag layouts are under Admin → Label templates.
1. Add a device and set up registers
Add each printer here, then add your registers. Each register knows which computer it is and where its receipts and labels print — staff never have to choose.
123
1Pick the model, name it, Add device.
2Add a till with a cash drawer.
3Add a card-only station.
2. Test a printer and set the drawer
Each printer has Print test and, for receipt printers, Open drawer. Below them, Cash drawer sets when the drawer pops.
 123
123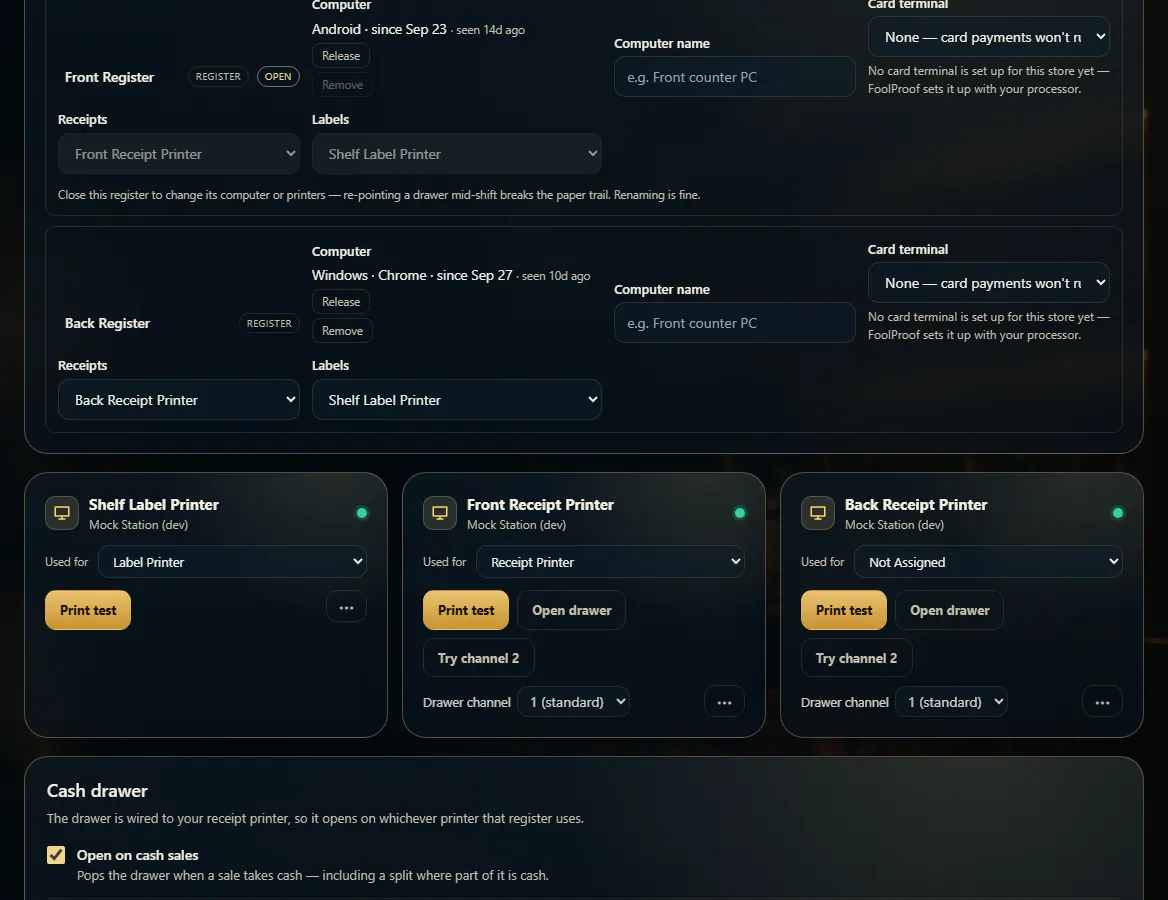 123
123